Skip to content


Swimwear Customization Options
Choose silhouettes, support, trims, labels and packaging—and turn those choices into an actionable brief for your next collection.
Customization becomes easier when the decisions are made in the right order: define how the garment should fit, choose materials and components, then prepare the brand details that will appear on the finished product.
This guide helps turn a reference swimsuit or an early design idea into a brief that can be quoted, sampled and approved. For MLY’s available service overview, visit Private Label; for materials and sample verification, use the related Resources guides.
On this page
Start with the customization decision
A custom swimsuit is not a single decision about color and logo. Silhouette, support, materials, hardware and branding have to work together. A change to one part can influence fit, sample work, price or the way the finished product is packed.
Start with the reference, then specify the difference. You may have a photo of a neckline you like, a physical garment to compare, a completed technical pack or a catalog style that suggests a direction. Each is useful, but none is automatically a production-ready specification. MLY’s catalog samples are design references, not goods held as ready-to-ship inventory.
To make conversations productive, separate your customization into three types:
| Level | Typical decisions | What to confirm |
|---|---|---|
| Appearance | Color, print, texture, branding placement | Artwork, colors, placement and material compatibility |
| Construction | Neckline, straps, cup support, lining, cut and coverage | Technical drawings, measurements, sample fit and finishing |
| Brand presentation | Labels, hangtags, hygienic liners, bags and cartons | Artwork, approved text, dimensions, minimum quantities and packing method |
You do not need to finalize every detail before the first conversation. You do need to distinguish what is fixed from what may change, so sample revisions can be evaluated against a clear brief. For the broader development process, see Sampling & Product Development.
Explore what you can customize


Start with a design direction, then identify which details should change in your own sample.
Shape the silhouette and coverage
Silhouette is the most visible customization decision—and one of the easiest to miscommunicate through photographs alone. A high-waist bikini bottom, a halter one-piece and a bandeau top may share the same color but require different patterns, support construction and fitting checks.
For the top or bodice, identify the neckline, cup shape, strap width, back closure and coverage at the bust. For the bottom, identify waist rise, leg opening, front and back coverage and gusset shape. For a one-piece, add torso length and the relationship between upper-body support and lower-body coverage.
A customer may describe a bottom as “full coverage” while the factory reads the reference as “moderate.” Use front-and-back flat sketches, sample photos and measurements to make the description specific. The terms cheeky, Brazilian and full are useful starting points, but they are not universal engineering measurements.
If your collection includes plus-size or long-torso products, record the target fit range early. A design that works in one base size may need more than simple proportional enlargement. Check coverage and comfort through the intended size range, not only on a display sample.
Illustrative front and back views — use actual pattern drawings and measurements for production.
Explore a design area
Specify waist rise, leg opening, gusset shape and the desired front-to-back coverage; include both views and a fit reference.
Useful input: front/back flat sketches + target sizeSilhouette references from MLY


These are style references for discussion, not stocked designs ready for dispatch.
Design support and construction together
Support comes from the combination of pattern shape, fabric behavior, lining and component placement. A wide strap may distribute force differently from a narrow tie; a lined cup may have a different appearance under tension from an unlined one; and a decorative cut-out changes how the surrounding panels behave.
For tops, consider whether the design requires removable padding, a cup pocket, an under-bust band, power-mesh support, adjustable straps or underwire construction. These are design options to assess, not features assumed to be included in every MLY style. For bottoms, the same approach applies to waistbands, elastic edges, gussets and internal seams.
The simplest way to review support is to connect each choice with a fit question:
| Component | Design question | Sample check |
|---|---|---|
| Straps & adjusters | Fixed, adjustable, cross-back or tie? | Position, pressure, adjustment range and security |
| Cups & lining | Smooth appearance or additional support? | Shape, opacity, seams and movement |
| Under-bust / waistband | How is the garment held in place? | Comfort, rolling, compression and recovery |
| Elastic & openings | How should the edge sit on the body? | Digging, gaping and recovery after stretch |
| Closures & joins | How will it open, fasten and withstand motion? | Function, comfort and surrounding reinforcement |
An attractive flat drawing is only the starting point. Review the assembled garment in the required fabric and size. Detailed fit checks and points of measure belong in the Sampling guide; material performance comparisons belong in the Fabrics guide.
Specify hardware, closures and decorative details
Adjusters, rings, hooks and charms can define the visual identity of a swimsuit. They also introduce new dimensions and contact points. A metal O-ring may look correct in a product photograph but feel heavy or sit awkwardly once attached to a stretch fabric.
In our sample room and showroom, we stock a wide array of tested chlorine-resistant hardware: O-rings, sliders, clasps, and decorative metal charms in shiny gold, rose gold, matte black, and silver finishes. If your brand requires proprietary custom-molded hardware with an engraved or debossed logo, we open custom tooling molds and provide pre-production metal strike-offs for your sign-off.
Record the strap or elastic width before selecting an adjuster; specify the internal opening where it matters. For closures, describe the fastening action, location and any reinforcement. For decorative elements, discuss weight, edges, placement and how the component behaves during wear and laundering.
Custom logo hardware or tooling may require its own quotation and minimum order quantity. Ask for a quote that separates the part cost, any tooling, sample approval and sourcing schedule. Request an actual part sample when its feel or operation is central to the design.
Slider & ring
Check the strap width, internal opening, metal or resin preference, thickness and comfort where the part touches the body.
- Specify
- Strap width, inner dimensions and finish
- Approve
- Fit on the actual strap and sample garment
Applied detail in finished styles
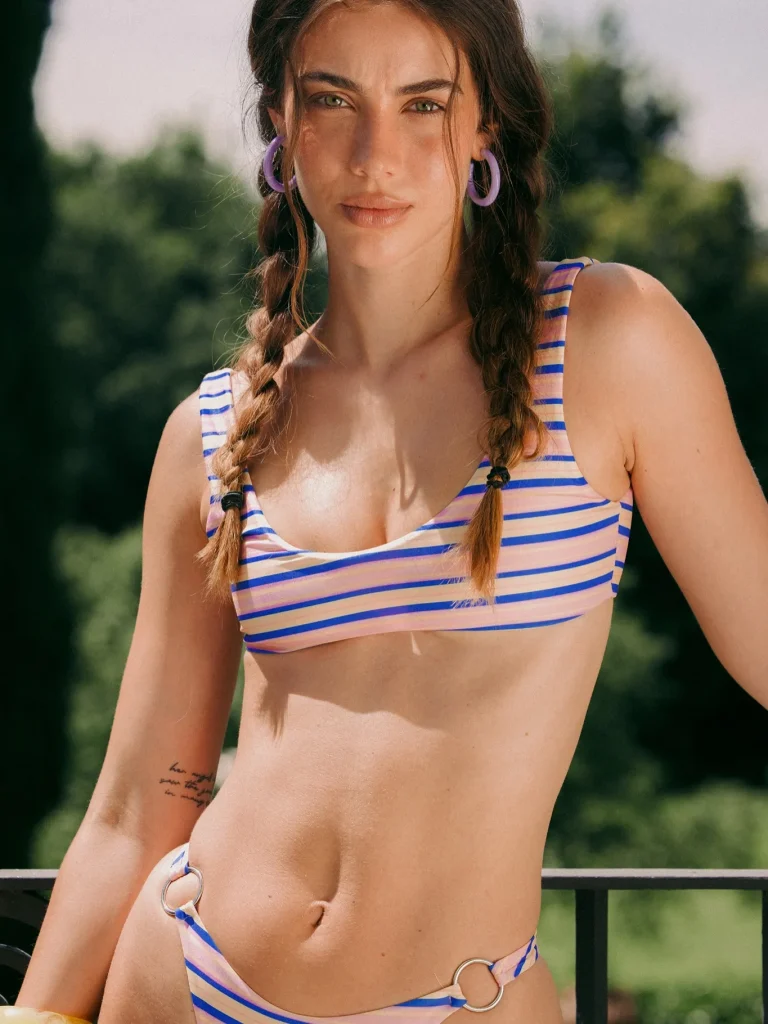
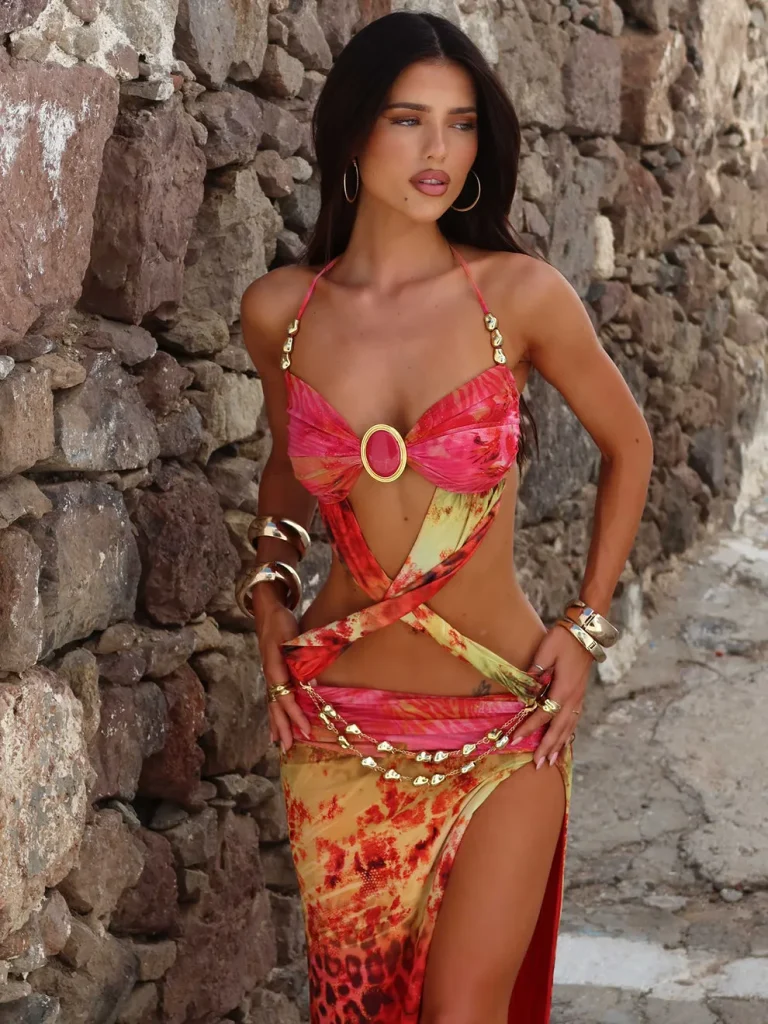
Product references help show proportion and placement; hardware material, size and supplier availability are agreed for each development.
Coordinate fabric, color and surface detail
Color and print decisions become useful only when attached to an actual fabric and a final-sized artwork file. The same motif can look different when printed on a smooth tricot, a ribbed surface or a material with a metallic finish. Stretch, lining color and seam placement further change the result.
For solid colors, record the color reference, fabric code and whether different panels must match. For printed styles, record the pattern scale, repeat direction, orientation, artwork version and any placement requirements. For embroidery, patches or applied logos, identify the exact location and how the design should be tested on the garment’s stretch area.
A repeat print covers a continuous surface; a placement print has a specific relationship to a garment panel or seam. They need different approvals. Confirm both the flat print and its appearance on an assembled sample before locking a production design.
The detailed comparison of printing methods, fabric compatibility and material evidence is covered in Fabrics, Prints & Materials. This guide focuses on turning those choices into a coherent garment design.
Confirm scale, direction and matching at seams
Confirm a specific location on the garment panel
Published print and embellishment examples


Choose the appearance here; confirm technical printing compatibility and performance in the materials guide.
Turn brand identity into usable labels
A brand label does more than display a logo. It must fit its position, feel acceptable against the skin and carry the information the relevant product and sales market require.
In our branding workshop, we produce woven labels, ultra-soft heat-transfer silicone stamps, printed satin tags, and clear TPU labels. For swimwear, we especially recommend skin-friendly heat-transfer labels for main branding and care instructions, ensuring zero itching or chafing during active swimming.
Supply a clean logo artwork file, finished label dimensions, exact text, placement and desired color. Care wording, fiber content, country of origin and other product labels should be checked against the product details and intended selling market; the manufacturer should not have to invent legal or brand copy during sample approval.
Before confirming a heat transfer or sewn-in label, check legibility, durability under expected care, backing feel and placement. A beautiful label that curls, peels or rubs against the skin will undermine the finished product.
Label formats shown by MLY


These examples illustrate format and finish. Approve final artwork, wording and placement for the chosen product.
Choose packaging that fits the product and channel
Packaging protects the product in transit, helps the customer identify the size and color, and contributes to the unboxing experience. For retail-ready collections, presentation may include a hygienic liner, hangtag, folded insert, branded bag and outer-carton identification. Not every channel requires the same combination.
To deliver a cohesive retail unboxing experience, we customize retail packaging in-house: frosted zipper pouches, breathable mesh bags, biodegradable PLA polybags, and custom hangtags with branded safety pins. We also apply self-adhesive hygienic liners to all bikini bottoms and one-pieces as standard industry practice.
Decide whether the priority is product protection, compact shipping, visible branding or reusable presentation. Then specify bag dimensions, closure, opacity, print position, packing quantity, barcode or size identification and outer-carton needs.
Packaging and trim minimums can differ from garment MOQ. Ask for a separate quotation and quantities for bags, printed inserts or custom labels instead of assuming the garment minimum covers all components. If an environmental statement will appear on packaging, obtain documentation appropriate to the actual material and claim.
Packaging formats shown by MLY


Choose the presentation first, then confirm bag dimensions, substrate, branding process and component minimums.
Plan component quantities alongside garment quantities
An apparel order combines several supply decisions. Garments are organized by style and color; hardware can be ordered by size or finish; labels and printed packaging may be sourced in separate batches. These quantities need to meet in one production plan without being silently treated as equivalent.
At MLY, our standard private-label production begins at 100 pieces per order and at least 50 pieces per style and color. Repeat orders enjoy this same low-barrier volume. Within that 100-piece run, our workshop comfortably grades across up to 5 sizes (e.g., XS–XL), giving your collection complete market appeal.
Treat the garment minimum as one layer of the order. A special fabric, custom charm, branded bag or additional print process may introduce a separate supplier minimum or sample expense. Prepare a line-item table so the team can quote each component transparently.
For detailed MOQ examples, sample charges and production lead times, use MOQ, Pricing & Timelines. For materials, remember that a fabric minimum expressed in yards must not be interpreted as the same number of finished garments.
Style / color and order total
Our standard production baselineHardware / labels / printed items
Separate sourcing requirementsBags / inserts / cartons
Separate material and print runsFrom reference style to approved specification
A catalog reference is an efficient conversation starter, but styles in our catalog are proven development references, not ready-stock inventory. Our practical private-label workflow is straightforward: select a design direction, define your custom adjustments, review a physical bench sample, and sign off on the golden pre-production unit before bulk cutting.
Use a single style ID and version to connect every decision: neckline and coverage, fabric code, print reference, size chart, hardware dimensions, label artwork and packaging specifications. When something changes, update the record and note whether a new sample or additional expense is required.
A useful approval record states what was reviewed, which sample and artwork version it refers to, who approved it and what is still open. If a requested change concerns the customer’s new design direction, it is different from correcting a factory-made error. The detailed revision and sampling policy belongs in Sampling & Product Development.
A precise sample approval makes later quality checks easier: the approved version, measured fit and component list become the reference points for production—not a collage of images and informal chat messages.
Prepare a customization brief
You can begin with sketches, a physical reference or a more complete technical pack. The following checklist helps organize the information that matters to a custom swimwear discussion; it does not require every decision to be locked before you contact MLY.
Provide one clear set of details for each proposed style: front and back views; intended coverage and size range; outer fabric and lining direction; colors and print artwork; straps, cups and hardware; label and packaging requirements; proposed quantities; and target market or delivery needs.
Mark completed areas and copy the checklist to use in a project enquiry. Keep any undecided choices visible rather than filling them with assumptions. Once a development route is agreed, the same information can be converted into a more detailed Tech Pack and sample-approval record.
Select the details you already have
Frequently asked questions
Can I change an existing style shown in MLY’s catalog?
The catalog provides style references, not ready-stock products. Explain which aspects you want to keep or change—such as neckline, coverage, fabric or hardware—so the team can assess the development work and quote the proposed sample.
How do I choose the right ring, slider or clasp?
Specify the intended placement, strap width, internal dimensions, material or finish preference, and comfort requirements. Ask to review the actual part on a sample. Similar-looking components can behave differently once attached to stretch fabrics.
Does garment MOQ also cover labels and packaging?
Not necessarily. The general garment minimum is 100 pieces per order and 50 per style-color, while printed bags, specialty components and materials may have separate sourcing quantities. Confirm each item’s minimum and any extra cost in the quotation.
What artwork should I supply for brand labels?
Share the logo file, exact wording, dimensions, colors and proposed placement. Identify which information is meant for a brand label, size label or care label and check that product-specific wording fits your target market.
Can I use recycled or lower-impact packaging for a small order?
MLY shows several packaging options, including recycled-material and reusable concepts. Availability, branding methods, supporting documentation and packaging minimums depend on the selected option; review them separately from the garment order.
Bring your customization idea to MLY
Whether you have a reference swimsuit, an outline drawing or a full technical pack, the next step is to compare your proposed changes with the appropriate fabrics, components and sample requirements. Share the details that you have and identify what still needs to be decided.
Prefer to reach MLY directly? Use the contact page.